How to Install a Dash Cam: A Step-by-Step Guide (No Wires Showing)
A dash cam is an invaluable tool for any driver. It provides a record of events on the road, which can be crucial in the event of an accident. However, a dangling power cord can be a distraction and an eyesore. Fortunately, with a little bit of planning, you can easily install a dash cam and conceal the wires for a clean, professional-looking setup. This guide will walk you through the process, from choosing the right location to tucking away the final cable.
Step 1: Choose the Right Location
The first step is to determine the best placement for your dash cam. The ideal location is typically behind the rearview mirror, on the passenger side of the windshield. This placement ensures the camera has a clear, unobstructed view of the road ahead without impeding the driver's vision. Before you permanently mount the camera, it's a good idea to power it on and check the field of view on the camera's screen or via its mobile app.
Step 2: Mount the Dash Cam
Once you've found the perfect spot, it's time to mount the camera. Most dash cams come with an adhesive mount. Clean the windshield thoroughly with rubbing alcohol to ensure a strong bond. Peel the backing off the adhesive pad and press the mount firmly against the glass. Hold it in place for at least 30 seconds to allow the adhesive to set.
Step 3: Route the Power Cable
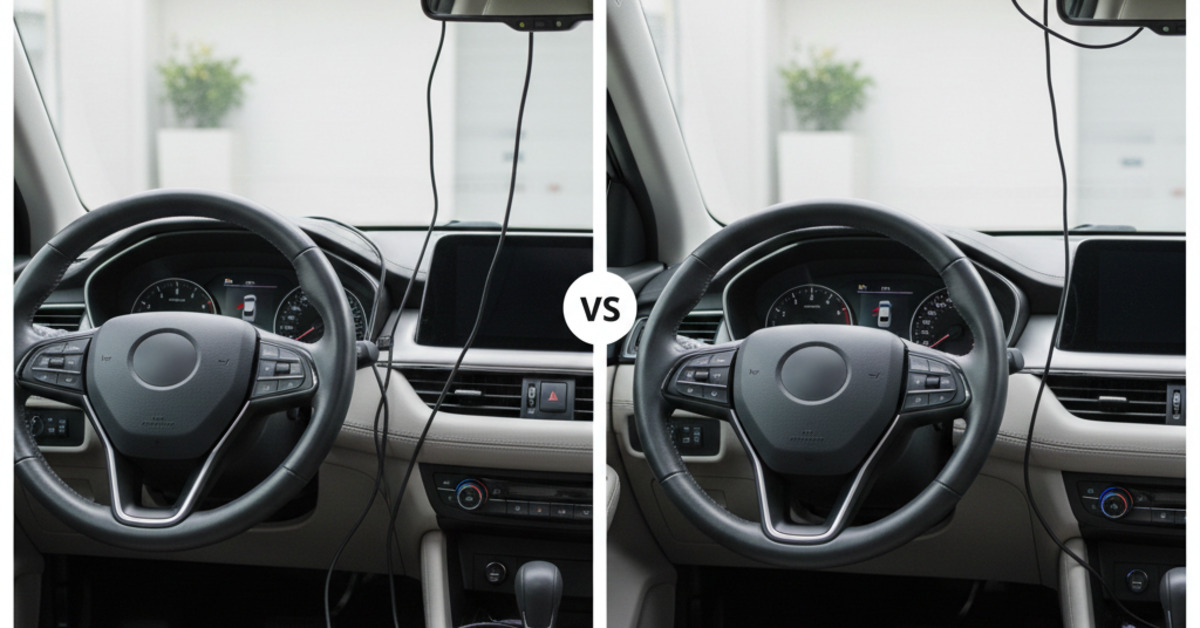
Now comes the most important part: hiding the power cable. The goal is to route the cable from the dash cam to a power source (usually a 12V outlet or a fuse box) without it being visible.
Tucking into the Headliner: Start by tucking the cable into the headliner, the fabric-covered panel at the top of the windshield. You can use a plastic trim tool or your fingers to gently pry open a small gap and push the cable in.
Running Along the A-Pillar: Next, run the cable along the A-pillar, the vertical support on the side of the windshield. Most vehicles have a rubber weatherstripping seal along the A-pillar that you can gently pull back to create a channel for the cable.
Under the Dashboard: Once you reach the dashboard, you have a few options. You can either run the cable along the side of the dashboard and under the glove box, or you can route it through the dashboard itself. The latter option is more complex and may require removing some panels.
Step 4: Connect to Power
The final step is to connect the power cable to a power source. The easiest method is to use the 12V power outlet (cigarette lighter). However, for a more permanent and cleaner installation, you can hardwire the dash cam to the fuse box. This typically involves using a hardwire kit, which is often sold separately. If you're not comfortable with this step, it's best to consult a professional.
By following these steps, you can install a dash cam in your vehicle and neatly hide the wires for a professional and discreet setup. A clean installation not only looks better but also prevents the power cord from becoming a dangerous distraction.