Cold Plunge at Home: DIY Chest Freezer Setup Guide
Cold therapy, also known as cryotherapy, has been gaining popularity in recent years for its wide range of health benefits. From reducing inflammation and muscle soreness to improving circulation and boosting the immune system, the benefits of cold therapy are hard to ignore. One of the most popular ways to experience the benefits of cold therapy is with a cold plunge. But commercial cold plunges can be very expensive. The good news is that you can build your own cold plunge at home using a chest freezer for a fraction of the cost.
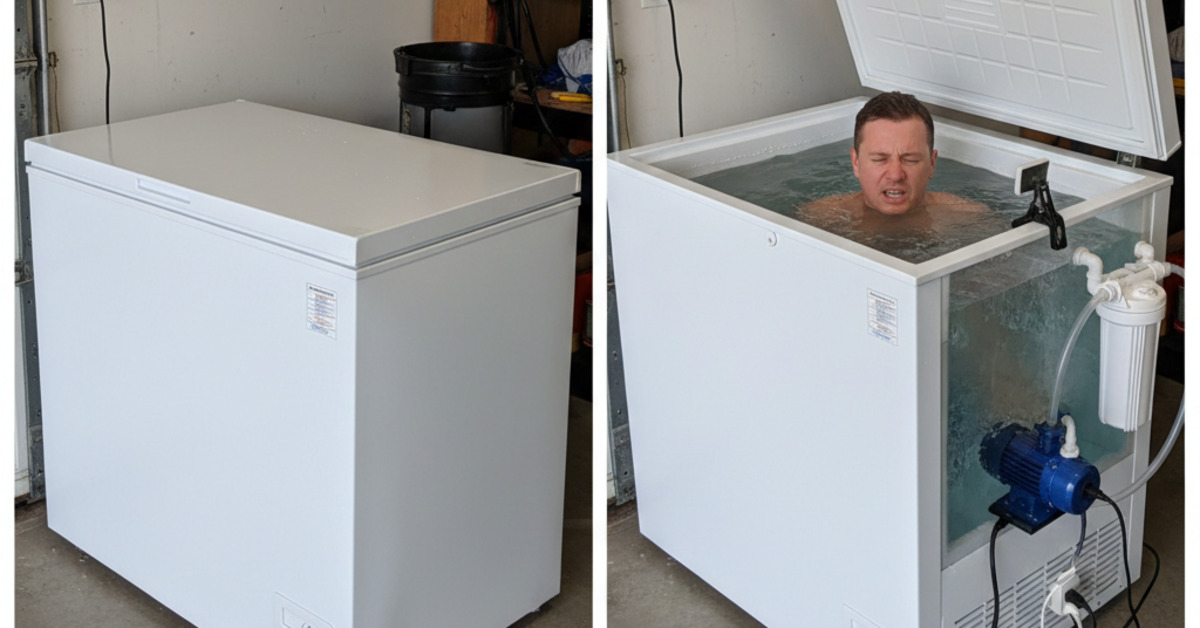
Why a Chest Freezer?
A chest freezer is the perfect vessel for a DIY cold plunge. It's well-insulated, it's watertight, and it's deep enough to allow you to fully submerge your body.
What You'll Need
Here's what you'll need to build your own cold plunge:
- Chest Freezer: The size of the chest freezer you'll need will depend on your height. A 7-cubic-foot chest freezer is a good size for most people.
- Temperature Controller: A temperature controller will allow you to set the water temperature to your desired level.
- Waterproof Sealant: You'll need to seal the seams of the chest freezer to prevent leaks.
- Water Filter: A water filter will help to keep the water clean.
- Ground Fault Circuit Interrupter (GFCI): A GFCI is an important safety device that will protect you from electrical shock.
Step-by-Step Guide
Here's a step-by-step guide to building your own cold plunge:
- Seal the Seams: The first step is to seal the seams of the chest freezer with a waterproof sealant. This is an important step to prevent leaks.
- Install the Temperature Controller: The temperature controller will allow you to set the water temperature to your desired level. Most temperature controllers have a probe that you will place in the water.
- Install the Water Filter: A water filter will help to keep the water clean. There are a variety of different water filters available, from simple inline filters to more advanced filtration systems.
- Install the GFCI: A GFCI is an important safety device that will protect you from electrical shock. It's a good idea to have a qualified electrician install the GFCI for you.
- Fill with Water: Once you've completed all of the above steps, you're ready to fill your cold plunge with water.
- Set the Temperature: Use the temperature controller to set the water temperature to your desired level. A good starting temperature is around 50-60 degrees Fahrenheit.
Safety Precautions
- Always use a GFCI.
- Never use the cold plunge alone.
- Start with a shorter plunge time and gradually increase it as you get more comfortable.
- Listen to your body. If you start to feel dizzy or lightheaded, get out of the cold plunge immediately.
- Consult with your doctor before starting a cold plunge routine, especially if you have any underlying health conditions.
The Bottom Line
A DIY cold plunge is a great way to experience the benefits of cold therapy without breaking the bank. By following these steps, you can build your own cold plunge at home and start enjoying the many health benefits of cold therapy.