Your Favorite Coffee Shop Drink, for a Fraction of the Price
Cold brew coffee has taken the world by storm, and for good reason. It's smoother, less acidic, and has a naturally sweeter taste than coffee brewed with hot water. This brewing method replaces heat with time, resulting in a rich, mellow coffee concentrate that's perfect for a refreshing iced coffee.
While a cup of cold brew from a cafe can cost upwards of $5, you can make a whole week's worth at home for just a couple of dollars. Forget fancy equipment; all you need is a mason jar and your favorite coffee beans. This guide will teach you the foolproof mason jar cold brew method.
What You'll Need
- A large (32 oz or 1-quart) wide-mouth mason jar.
- Your favorite coffee beans.
- A coffee grinder (optional, but highly recommended for best results).
- A filter. You can use a coffee filter, a fine-mesh sieve, a French press, or even a clean cheesecloth or nut milk bag.
- Water.
The 4 Simple Steps to Perfect Cold Brew
Step 1: Get the Grind and Ratio Right
This is the most important part of any cold brew coffee recipe.
- The Grind: You need a coarse grind. This is crucial. A fine grind (like for drip coffee) will result in a cloudy, over-extracted, and bitter brew that is difficult to filter. Your grounds should look like coarse breadcrumbs or raw sugar. If you have your own grinder, set it to its coarsest setting. If you're buying from a coffee shop, ask them to grind it for French press.
- The Cold Brew Ratio: A good starting point is a 1:8 ratio of coffee to water by weight. If you don't have a scale, a simple volume ratio is 1/2 cup of coarsely ground coffee to 2 cups of water. This will create a ready-to-drink brew. For a stronger concentrate, use a 1:4 ratio (1/2 cup coffee to 1 cup water).
Step 2: Combine and Steep
- Pour your coarsely ground coffee into the bottom of the mason jar.
- Slowly pour your cool or room-temperature water over the grounds.
- Stir gently with a long spoon to ensure all the grounds are saturated with water.
- Screw the lid on the mason jar.
- Let it steep. Place the jar on your counter or in your fridge and leave it alone for 12 to 18 hours. 12 hours will give you a lighter brew; 18 hours will be stronger and more robust. Don't go over 24 hours, as it can start to extract bitter flavors.
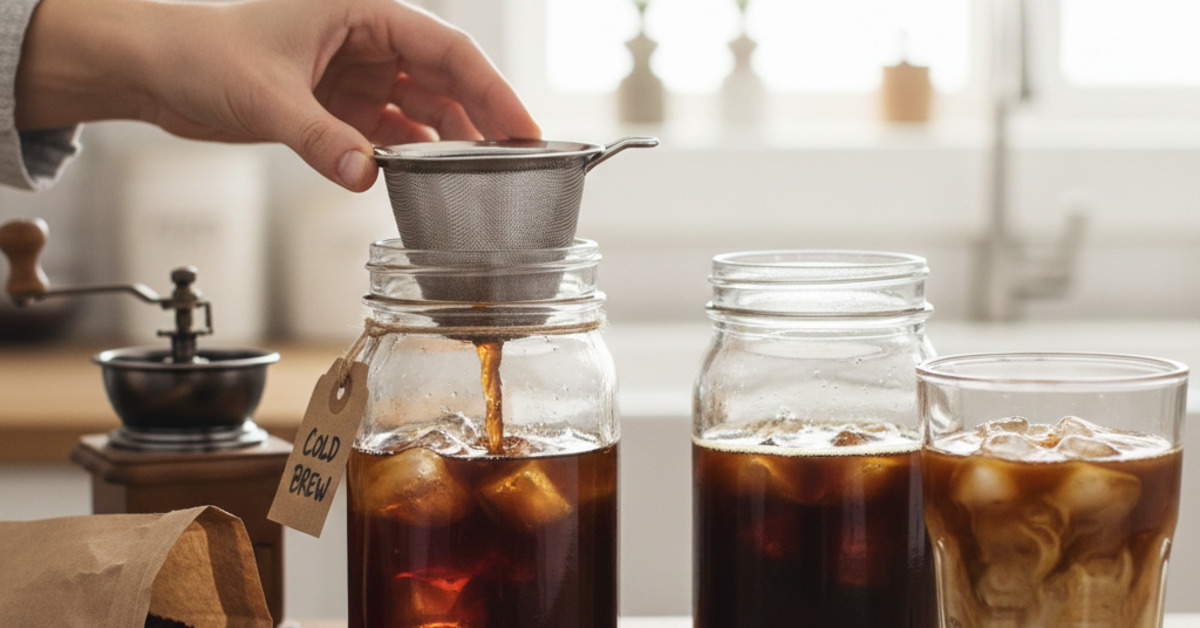
Step 3: Filter the Coffee
This is the messy part, but it's worth it.
- The Easiest Way: If you have a French press, pour the cold brew mixture into the press and gently press the plunger down.
- The Sieve & Coffee Filter Method: Place a fine-mesh sieve over a large bowl or another clean jar. For an even cleaner brew, line the sieve with a standard paper coffee filter. Slowly pour the cold brew mixture through the filter. This can take a few minutes, so be patient.
Step 4: Serve and Store
Congratulations, you've just made cold brew concentrate!
- To Serve: Pour your cold brew over a glass full of ice. If you made a strong concentrate, dilute it with water or your favorite milk (a 1:1 ratio of concentrate to water/milk is a good starting point).
- To Store: Your homemade cold brew can be stored in a sealed container in the fridge for up to two weeks.
This simple DIY cold brew method is a game-changer for coffee lovers. It's an easy, forgiving process that rewards you with a smooth, delicious, and budget-friendly supply of your favorite homemade iced coffee.